.png)

Add Vitis 2023.1 to an Existing Vivado Install
- Zach Pfeffer
- Aug 3, 2023
- 1 min read

This post shows step-by-step how to add Vitis 2023.1 to an existing Vivado install. It also contains links to all of the license agreements you'll need to agree to so you can view them outside of the installer.
Notes
Vivado was installed in this directory:
~/tools/amd/vivadoml/2023.1We'll install Vitis to:
~/tools/amd/This post is the continuation of:
Requirements
209.28 GB disk needed
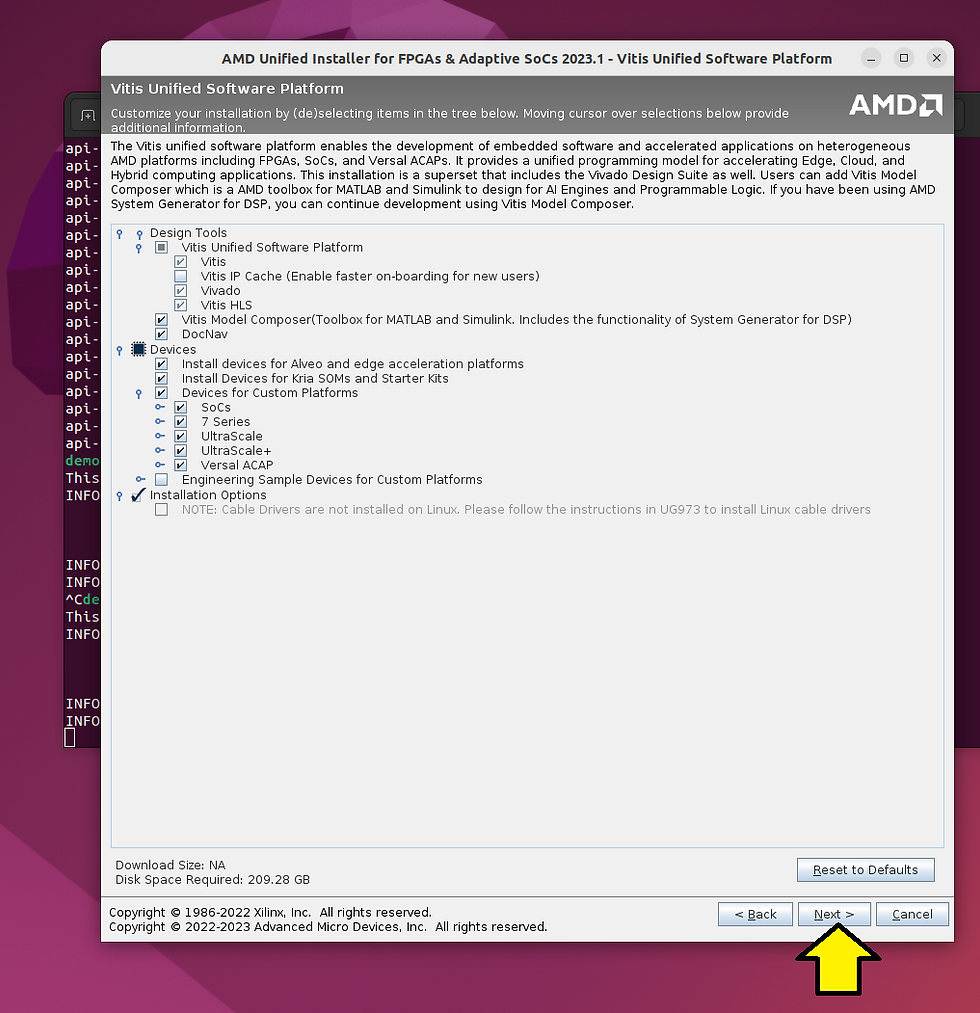
Run the installer
~/Xilinx_Unified_2023.1_0507_1903/xsetupSelect Vitis and click Next >.

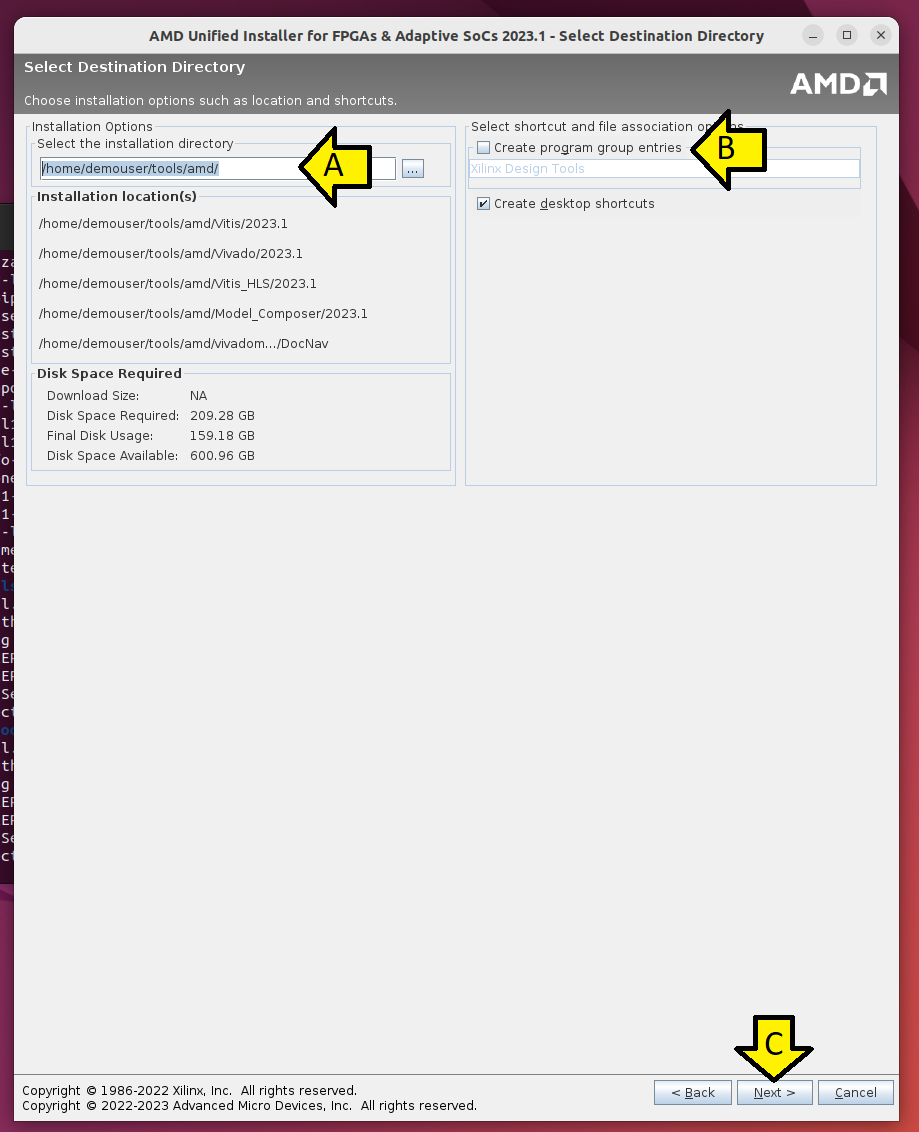
Leave the defaults selected and click Next >:
Agree to all and click Next >

Copies of the agreements
End User License Agreement for Vitis
End User License Agreement for Vivado
End User License Agreement for DocNav
End User License Agreement for Model Composer
Third Party Software End User License Agreement for Vitis
Third Party Software End User License Agreement for DocNav
Third Party Software End User License Agreement for Vivado
Third Party Software End User License Agreement for Model Composer
Use /home/demouser/tools/amd as the installation directory, deselectoff Create program group entries, click Next >
Click Install

This took 41 minutes on my computer.
Note the additional installation prompt and click OK

Source the environment
source ~/tools/amd/Vitis/2023.1/settings64.shRun vitis
vitisNote: If you see a small clipped window, close Vitis and relaunch it.
Here's the IDE
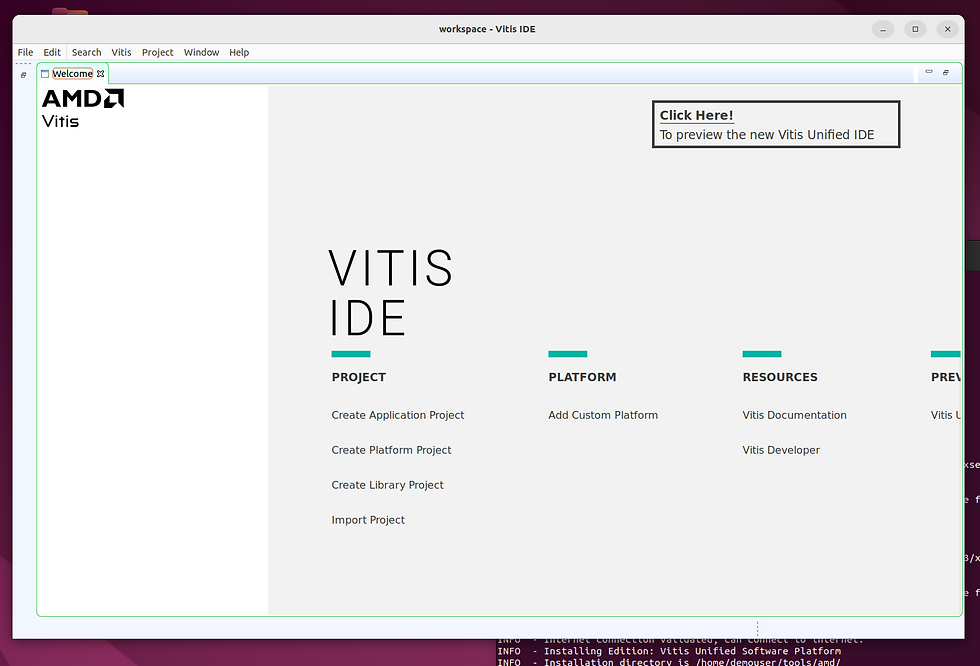
If you want to try and see the new IDE, click Yes

Note: I clicked this and did not see the new IDE.
This post showed how to add Vitis 2023.1 to an existing Vivado install.
References
Logo